
Assigning a Safety Training to an Employee on the Web
Updated 08/15/2023
Using the Safety Training feature, you can both assign a training to be delivered through iReportSource to your employees, or you can track attendance for in-person trainings/toolbox talks. This document shows how to assign training to be completed through the app or the web by employees. If you need to track attendance for an in-person training, see this document.
Log in at https://www.ireportapp.com/login
Click your desired location to enter your Dashboard
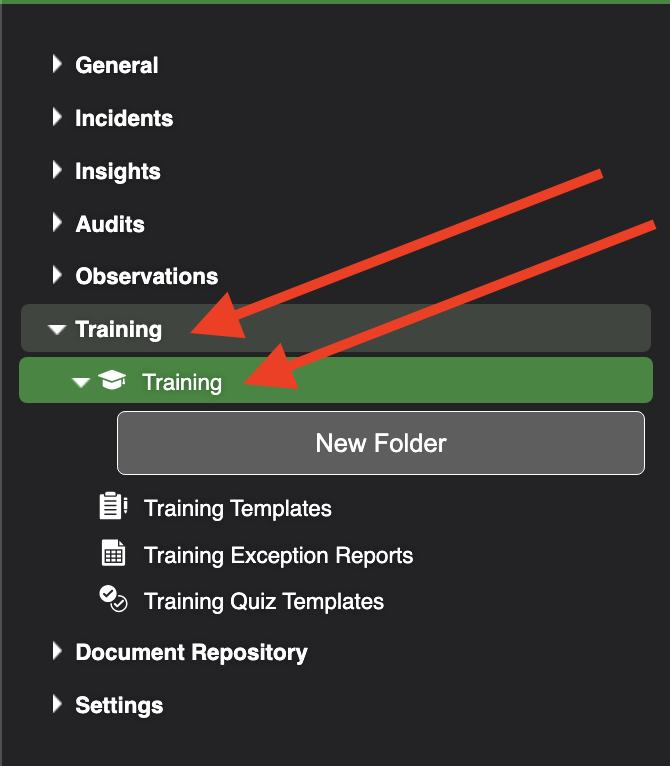
From the menu, choose Training and then choose Training:
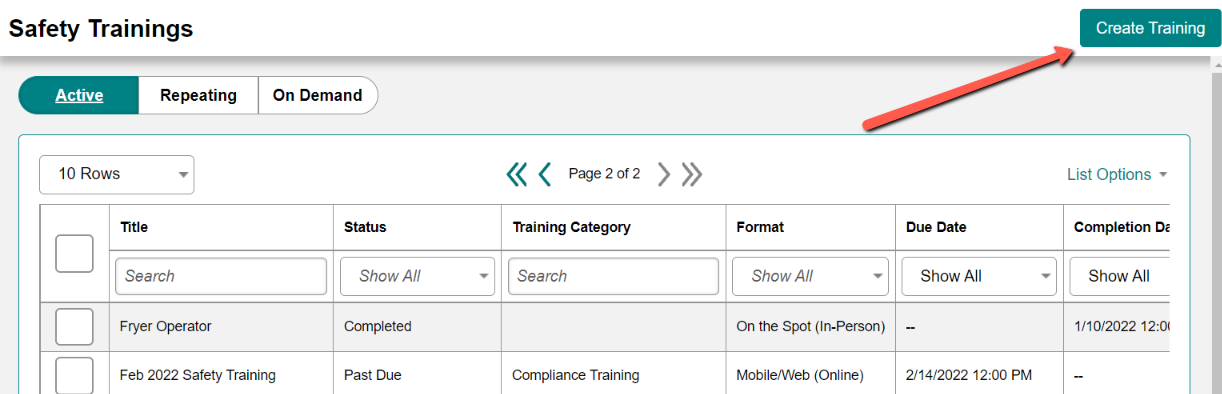
4. This screen shows all trainings that have been created previously. To assign a new training, click Create Training in the top right corner of the page:
5. Choose the Training Format:
Mobile/Web (Online) means you’ll be providing training material and/or a quiz to an employee for training that will completed on the app. These items will either come from a previously-created training template or added directly to the training at this time. The material will be sent to the assignee(s) you choose and they will be notified of a training being assigned to them when you create.
Scheduled (In-Person) means you will be assigned a training that will be performed in person. You will provide the materials and select the Administrator of the training. You can choose when the training is assigned and the due date.
On the Spot (In-Person) means the training occurs in person and the Adminstrator records the materials covered and the attendees at the time of the training.
(OPTIONAL): Choose a folder to add the training to. (This is for organization purposes on the Safety Training page).
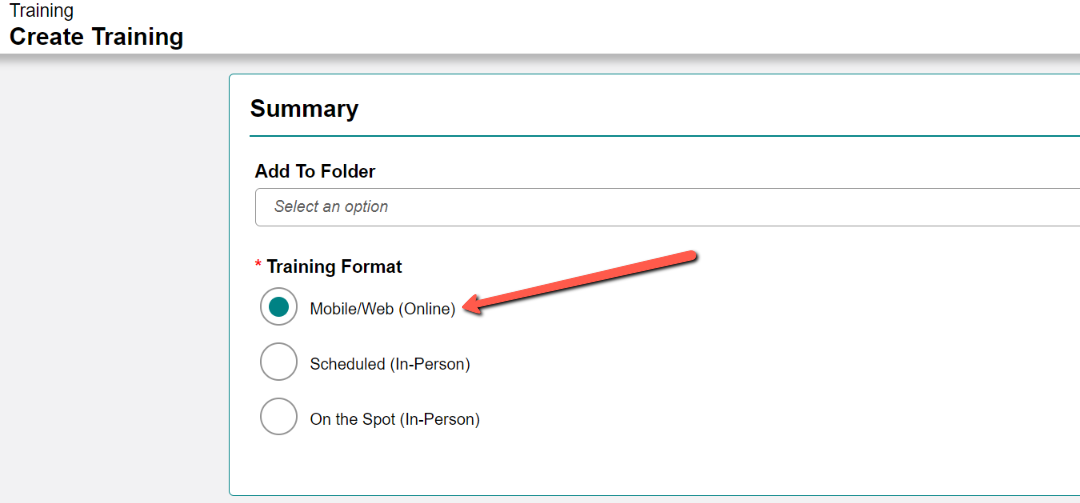
For this training, we will continue with the Mobile/Web (Online). Both Scheduled (In-Person) and On the Spot (In-Person) have a similar workflow to assign. These Trainings are explained more in this document.
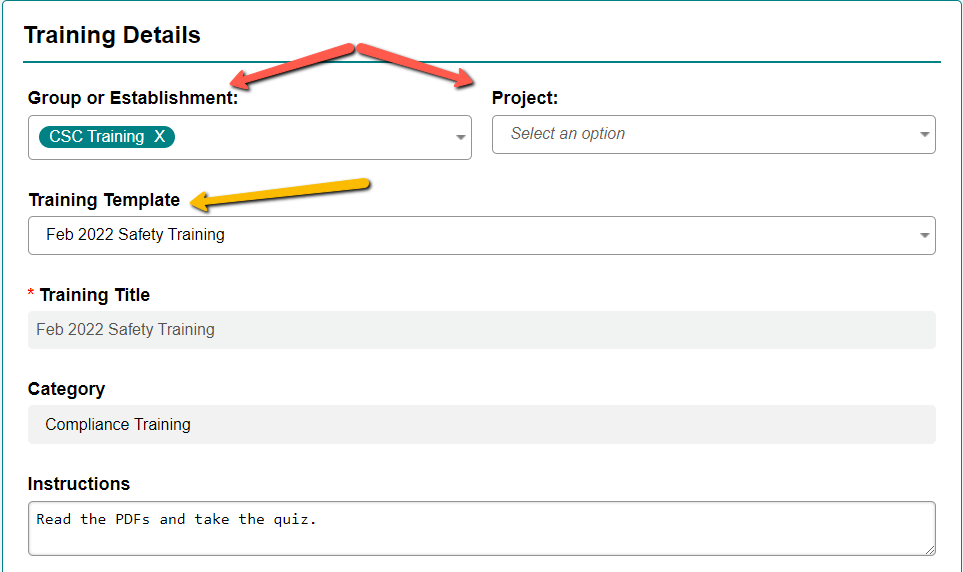
6. Select the Group or Establishment where you want to assign the training. You can optionally choose a Project as well if desired:
NOTE: This is important to select if you plan to do analytics by group or establishment. Not choosing one here will result in a blank in analytics
If you are using a training template, select the training you want to assign from the Training Template drop-down menu. The Training Title and Category will automatically be filled from the template. Place any instruction to employees when they take the training in the Instructions box.
Training materials are attached from the template - more can be added. The quiz, Approval Flow, and Training expires is pre-set from the template.
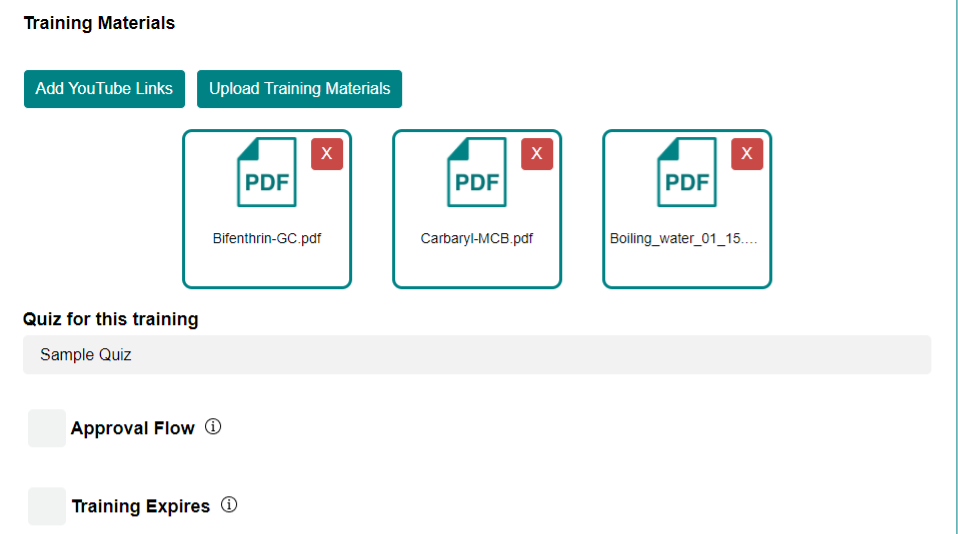
9. Note that the training title, instructions, quiz, approval flow and expiration date are already chosen if you’ve chosen a Training Template. If you choose not to use a Training Template, you will choose these settings:
Training Title - be sure to use a consistent naming convention to make running analytics easier later
Category - OSHA Required, Compliance Training, Optional Training, Other
Instructions - these are shown to employees when they take the training
Training Materials - YouTube links or uploaded files
Quiz - if you have created a quiz you’d like to use, choose it here. Please see this article for more information on creating training quizzes.
Approval Flow - if you check this box, it means after all trainings are submitted or after the due date passes (whichever comes first), an assigned approver will be able to review all submissions and decide whether to approve or reject the training, determining which employees receive credit for completion.
Training Expires - if this box is checked, you’ll be able to select an amount of time after a training is completed that is will expire.
Note **Either Training Materials or a Quiz are required to create a training, but you are not required to have both.**
10. If you chose to have an Approval Flow, you’ll be asked which employee is responsible for approving this training. You’ll be given a list of supervisors and above at the group/establishment you chose in the beginning:

11. Choose how you’d like the Schedule the training -- you have three options:
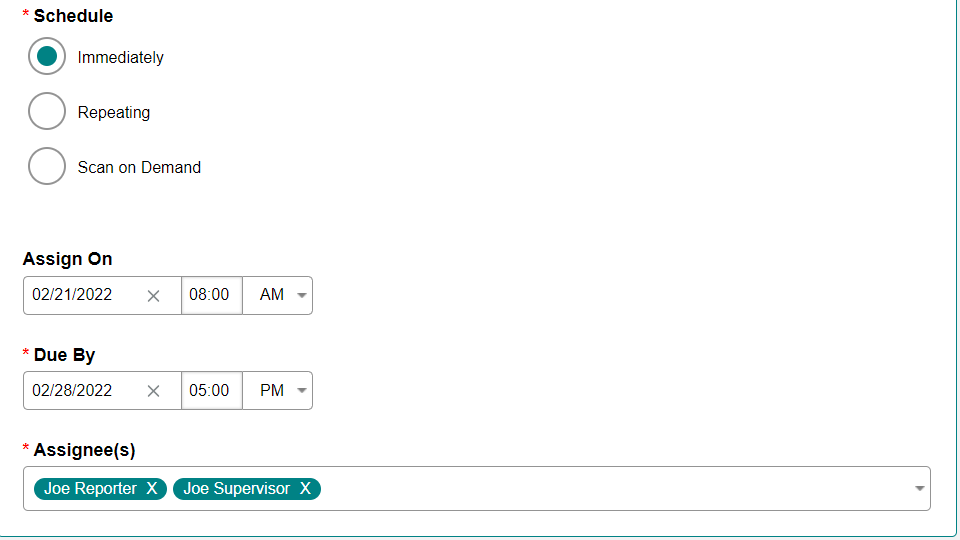
Immediately - this training will be sent to the assignee(s) immediately, and you’ll be able to choose an assignment date, a due date and time. This is a one-off training that will not repeat.
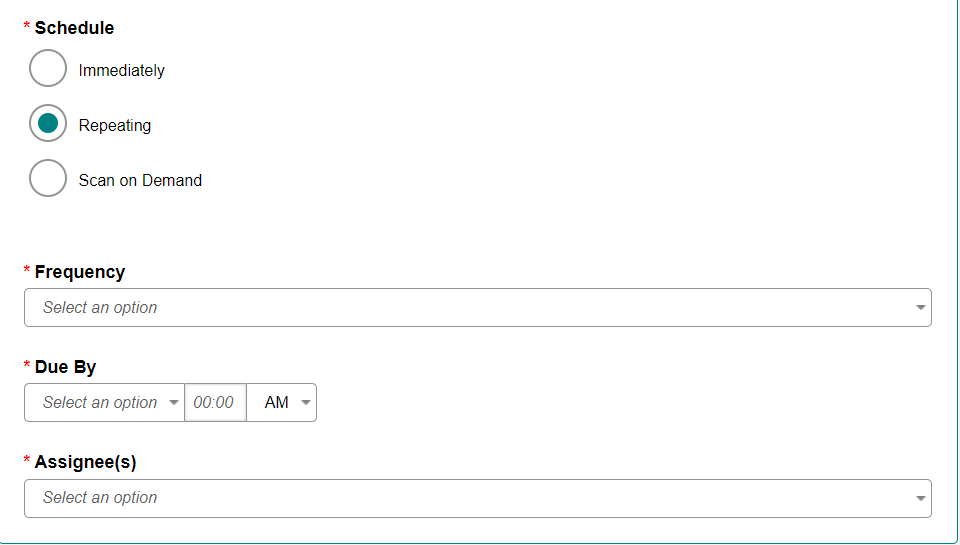
Repeating - you will choose the frequency with which you’d like to auto-assign this training to the assignee(s) you choose. It will ask you when to assign it (for example, if you choose yearly, it will ask which month you’d like to assign it in) and how long you’d like to give the assignee(s) to take the training after it is assigned (up to 1 month).
Scan on Demand - this assigns a QR code to the training materials, and you will not choose any assignees or due date. Employees will scan the QR code, at which point the training is auto-assigned to them and they will complete it at that time.
NOTE: Some people use this option as a virtual sign-in sheet for in-person meetings, or a quick way to have employees complete a quiz after an in-person meeting. It’s up to you how you want to use it!
12. If you choose Immediate, you have the option to select an Assign On date (no selection defaults to immediate). You then choose the Due Date and Assignee(s) to send the training to:
If you choose Repeating, you must select the Frequency, Due By date, and Assignee(s).
13. Once all required materials have been added, click the Create button. If you assigned the training to employees, they will receive a notification based on their notification preferences. It will also show up in their My To-Dos on their dashboard on the web or the mobile app.
Phone: 513-549-3459 x702